Include the Red Pitaya SCPI library
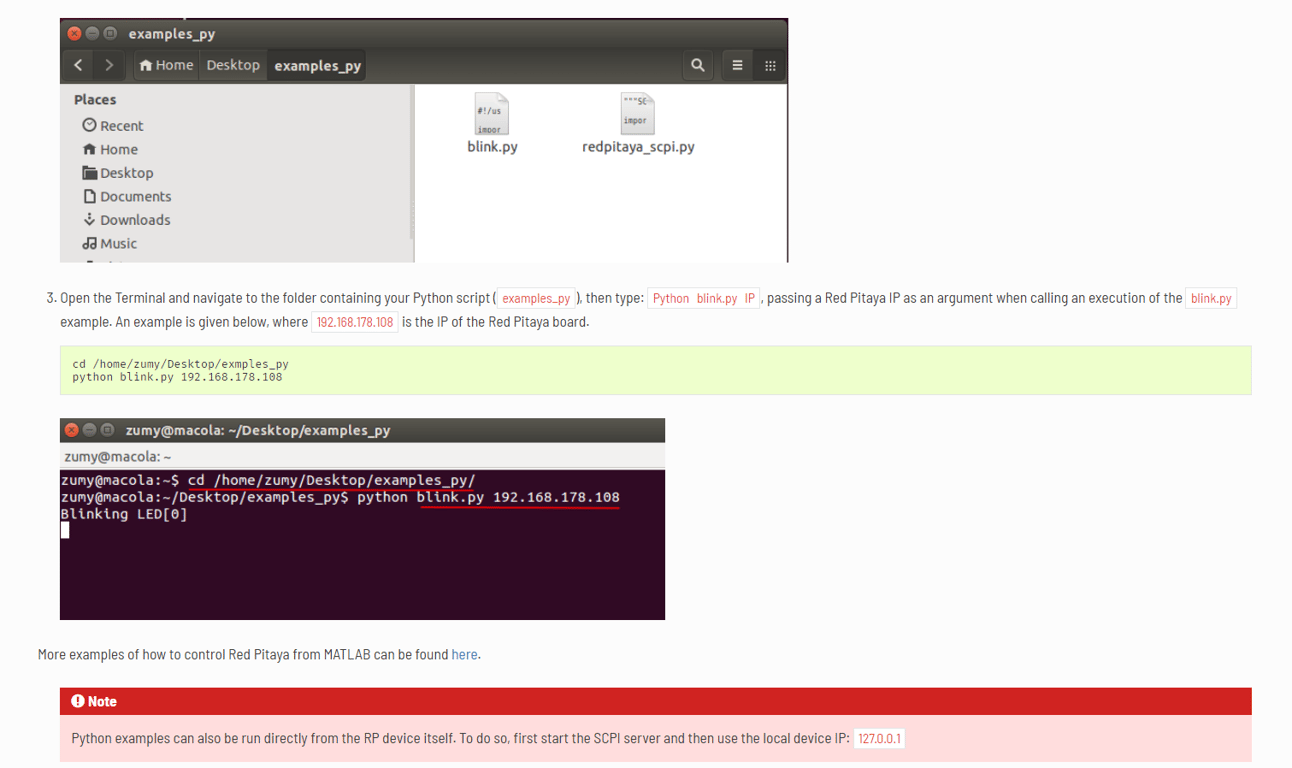
For Python, you will need to install the PyVISA library in combination with the PyVISA-py backend. Additionally, you need to copy the redpitaya_scpi.py script from our website. The redpitaya_scpi library needs to be in the same folder as your code as your Python script.
Follow these instructions:
Also, please install Numpy, Matplotlib, Pandas, and Scipy libraries.
Establish Red Pitaya SCPI communication
First, let's establish a connection to the Red Pitaya. We do this by specifying the device's IP address and establishing a socket communication.
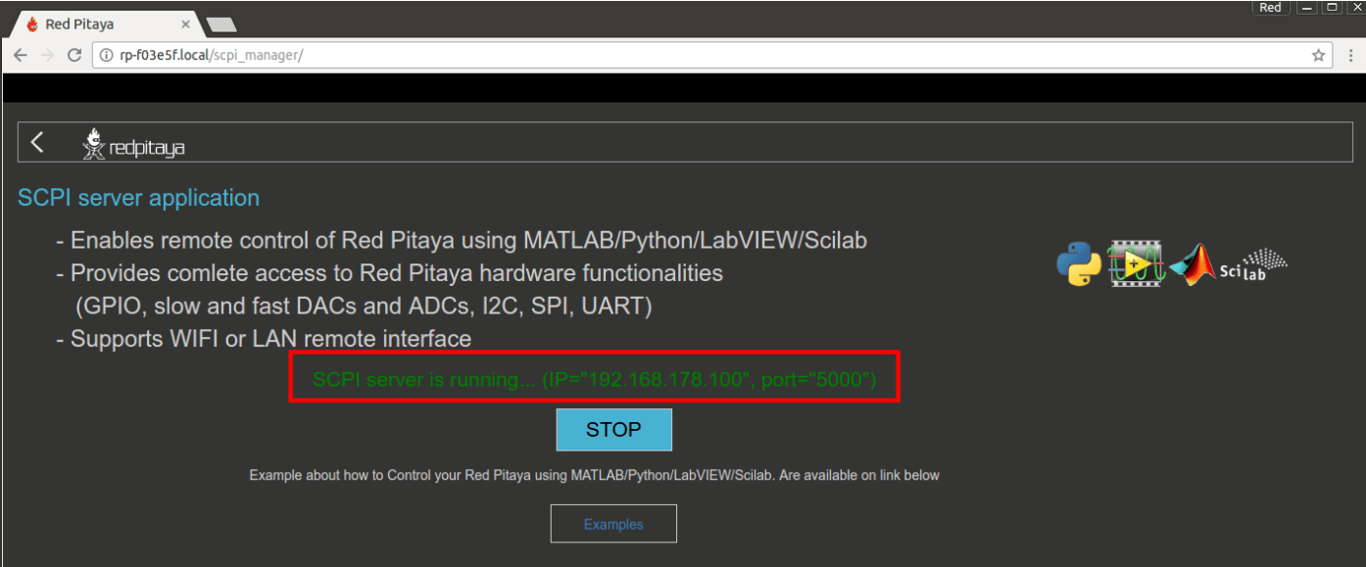
Open the Red Pitaya interface (type: “rp-XXXXXX.local/” in your browser) and navigate to the SCPI Server.
You can find your IP address under: Development>SCPI server>START>copy the IP address.
Here is the code for Python to connect to your Red Pitaya.
import redpitaya_scpi as scpi

IP = '169.254.68.107'
rp_s = scpi.scpi(IP)  # Establishing socket communication with Red Pitaya
Test: Blinky code
import redpitaya_scpi as scpi
import time

IP = '169.254.68.107'
rp_s = scpi.scpi(IP)

for i in range(0,10,1):
	rp_s.tx_txt('DIG:PIN LED0,1')
	time.sleep(1)
	rp_s.tx_txt('DIG:PIN LED,0')
	time sleep(1)

rp_s.close()
 Made with Bullet